
How to Sleep Warmer in a Truck Bed Tent: Complete Insulation Guide
The number one complaint from first-time truck bed tent campers in shoulder season is not about the tent. It is not about the sleeping bag. It is about waking up at 3 AM colder than the thermometer suggests they should be.
The reason is almost always the same: they did not account for the metal truck bed beneath them.
A metal truck bed conducts heat away from your sleeping surface significantly faster than soil, grass, or any surface a ground tent sits on. The physics are straightforward: metal has a thermal conductivity approximately 1,000 times higher than still air and roughly 10 to 15 times higher than the soil beneath a ground tent. Your sleeping bag was rated for a test conducted on an insulating surface. The metal truck bed is not that surface.
This guide explains exactly where heat loss happens in a truck bed tent setup, how to address each source, and what the correct priority order is, because spending money on the wrong solution first is the most common mistake truck tent campers make when trying to sleep warmer.
The Four Heat Loss Pathways in a Truck Bed Tent
Understanding where you lose heat tells you where to invest in solutions. There are four pathways, and they are not equally important.
- Conduction through the metal bed (highest priority)
The metal truck bed draws heat from anything resting on it. This is the heat loss pathway that sleeping bag temperature ratings do not account for, because laboratory testing places bags on insulating foam surfaces. A bag rated to 20°F placed directly on a bare metal truck bed in 30°F conditions will not perform to its rated temperature, the metal defeats the bag’s insulation from below faster than the bag can compensate.
- Convection through uninsulated tent fabric (second priority)
Cold air moving across the outside of the tent fabric carries heat through the fabric by convection. The tent body and rainfly slow this process but do not eliminate it. A tent with no rainfly deployed, or a rainfly sitting flush against the tent walls with no air gap, loses heat significantly faster than one with a properly tensioned full rainfly.
- Radiation from the tent walls (third priority)
Your body radiates infrared heat continuously. In a small enclosed tent on a cold night, some of that radiated heat reaches the tent walls and is lost through the fabric. A reflective vapor barrier or reflective sleeping bag liner intercepts some of this radiation, but this is a lower-magnitude heat loss pathway than the first two.
- The tailgate gap (often overlooked)
The junction between the tailgate sleeve and the truck’s tailgate allows cold air infiltration that bypasses the tent body entirely. Cold air entering through this gap chills the sleeping environment from the rear entry point, a draft that is not stopped by your sleeping bag insulation because it is moving through the air around you rather than conducting through the sleeping surface.
Solution 1: Fix the Floor First (Non-Negotiable)
This is the highest-priority step and the one most campers skip because it is less intuitive than buying a warmer sleeping bag.
The correct floor insulation system for a truck bed tent has two layers:
- Base layer: closed-cell foam pad directly on the metal bed surface.
Closed-cell foam cannot compress, cannot absorb moisture, and does not lose insulating capacity at any temperature. A standard 3/8-inch closed-cell foam sleeping pad placed flat on the truck bed surface as a base layer creates the first thermal break between the metal and your sleeping system. The Therm-a-Rest Z Lite Sol and the NEMO Switchback are both well-regarded options that fold compactly alongside other truck bed gear.
- Comfort layer: insulated sleeping pad or cot on top of the foam base.
An insulated self-inflating pad with an R-value of 4 or above placed on top of the closed-cell foam base provides the sleeping comfort that foam alone cannot deliver. The R-value measures thermal resistance; higher numbers mean better insulation.
For three-season truck tent camping, R-4 is the practical minimum. For temperatures below 20°F, R-6 or above is the appropriate target. Alternatively, a camping cot on top of the closed-cell foam base elevates you above the metal surface entirely, replacing the air pad’s insulating function with an air column beneath the cot frame.
The two-layer system addresses conductive heat loss at its source. Every other insulation improvement in this guide is a supplement to this foundation, not a substitute for it.
Solution 2: Your Sleeping Bag Is Probably Under-Rated for This Situation
Sleeping bag temperature ratings follow the ISO 23537 standard, which tests bags in controlled laboratory conditions that include an insulating sleeping surface beneath the bag. The “comfort” rating describes the temperature at which an average adult female sleeps comfortably for 8 hours. The “lower limit” rating describes the temperature at which an average adult male curls up and sleeps for 6 hours without waking.
Neither test accounts for a metal truck bed.
The practical guidance for truck bed tent camping is to treat your sleeping bag’s lower limit rating as your outdoor temperature upper limit, not your lower limit. If the expected overnight low is 40°F, bring a bag rated to 20°F. If the expected overnight low is 25°F, bring a bag rated to 0°F or below.
This sounds excessive until you experience the first night when the floor insulation system is working correctly, and you realize the metal bed has been defeating your sleeping bag’s performance for every previous cold night.
Sleeping bag liners provide an adjustable warmth buffer without requiring a heavier bag for every trip. A merino wool liner adds 10 to 15°F of effective warmth and manages moisture actively, important in a truck tent where condensation is a consistent overnight challenge. A synthetic insulated liner adds 15 to 25°F and retains most of its insulating capacity when damp, making it the better choice for conditions where condensation is a significant factor.
Solution 3: Seal the Tailgate Gap
The tailgate sleeve junction is the primary cold air entry point in a truck bed tent setup. Even a well-fitted tailgate sleeve allows cold air convection between the sleeve fabric and the tailgate surface, a gap that creates a perceptible draft at the rear entry point through cold nights.
A reflective foam windshield sunshade, available at any auto parts store, cut to fit the inside face of your tailgate and placed inside the tent before sleeping, blocks this convection almost entirely. At under five dollars and negligible weight, it is the most cost-effective cold-weather improvement available for a truck bed tent setup.
Additionally, confirm that the tailgate sleeve’s bottom closures are fully engaged with no gap at the sides. A gap of two or three inches along the tailgate edge allows cold air to enter the sleeping space from below the sleeve, not enough to feel as a strong draft but enough to lower the effective sleeping temperature by several degrees over a full night.
Solution 4: Manage Condensation Actively
Condensation in a cold truck bed tent is the hidden heat loss mechanism that often gets blamed on inadequate sleeping bags. When warm, moist air from your breathing contacts the cooler tent walls, it condenses into liquid water. That moisture accumulates on the inner tent surfaces and, eventually, on your sleeping bag’s exterior.
A wet sleeping bag exterior loses insulating efficiency. Down fill in particular loses virtually all thermal performance when wet, a process that happens gradually over a condensation-heavy night rather than all at once.
The counterintuitive response is controlled ventilation. Keeping a mesh window open by two to three inches on the lee side of the tent, away from the prevailing wind, allows moisture vapor to escape before it reaches condensation threshold on the tent walls. The small amount of heat lost through this opening is less damaging than the heat lost through a progressively wetter sleeping bag.
A camping fan set to its lowest speed on the opposite side of the tent from your sleeping position moves enough air to prevent condensation buildup without creating a cold draft across your sleeping surface. At one amp average draw, a 10,000mAh power bank runs a quality camping fan for 8 to 12 hours, sufficient for a full night’s ventilation.
Solution 5: Layer Your Sleeping Clothing System
What you wear to sleep in a cold truck tent matters as much as the sleeping bag around you. The layering approach is straightforward, but the specific material choices significantly affect the outcome.
- Base layer
A moisture-wicking base layer moves perspiration away from your skin continuously. Merino wool is the premium choice; it manages moisture actively, resists odor over multiple nights, and remains comfortable against the skin across a wide temperature range. Synthetic moisture-wicking fabric (polyester base layers) performs similarly at lower cost. Avoid cotton entirely in cold conditions; cotton absorbs and retains moisture against the skin, accelerating heat loss.
- Mid layer
A lightweight down or synthetic insulated jacket and pants worn inside your sleeping bag add meaningful warmth while preserving the ability to adjust. If the night is warmer than expected, you remove the mid layer without getting out of the bag. This flexibility is valuable in fall when overnight temperatures can vary 20 to 30°F from one night to the next.
- Extremities
Heat loss from the head, hands, and feet is disproportionate to their surface area. A wool or fleece beanie, liner gloves, and wool or synthetic socks are the three additions that deliver the most warmth per ounce in a cold sleeping setup. Experienced cold-weather truck campers often keep a chemical hand warmer in each sock on particularly cold nights, a low-tech solution that is reliably effective.
Solution 6: Pre-Warm Your Sleeping Bag
A cold sleeping bag requires your body heat alone to warm it to a comfortable temperature. In genuinely cold conditions, this process takes 20 to 40 minutes of shivering, during which your core temperature is dropping rather than stabilizing.
Pre-warming the bag before you climb in eliminates the shivering period and moves you to stable sleep temperature faster. Three methods that work reliably:
A hot water bottle filled before bed and placed inside the sleeping bag 20 to 30 minutes before sleep warms the bag interior and maintains heat for 3 to 5 hours. This is the oldest cold-weather camping trick and remains one of the most effective.
A battery-powered electric blanket inside the bag for 15 minutes before use warms the entire interior rather than a single spot, and can be left on low through the night if the power bank supports the draw.
The cab access panel on premium truck bed tent models, including the Napier Sportz 57 Series, allows a power cord to run from the truck’s interior into the tent, which makes a 12V electric blanket or heated mattress pad practical for the entire night without depleting a portable power bank.
The Priority Order Matters
This is the sequence to follow when investing in cold-weather sleeping improvements. The most common mistake is buying a new sleeping bag before fixing the floor, which produces marginal improvement because the floor problem defeats any sleeping bag improvement from below.
Step 1: Fix the floor, closed-cell foam base layer plus insulated pad or cot on top. This delivers the most improvement per dollar of any single change.
Step 2: Recalibrate your sleeping bag rating; ensure your bag is rated at least 20°F below your expected overnight low.
Step 3: Seal the tailgate gap with a reflective foam insert at the tailgate inside face.
Step 4: Add a sleeping bag liner, merino wool or synthetic for 10 to 25°F of additional warmth.
Step 5: Manage condensation with controlled ventilation or a low-speed fan.
Step 6: Layer your sleeping clothing: moisture-wicking base, insulated mid-layer, extremity coverage.
Step 7: Pre-warm your sleeping bag before climbing in.
Following this sequence produces measurably better results at lower total cost than any other order. The floor fix alone regularly transforms a cold, uncomfortable night into a genuinely warm one; the investment is a $20 foam pad and the understanding that the metal bed is the primary problem.
When a Cot Changes the Calculation
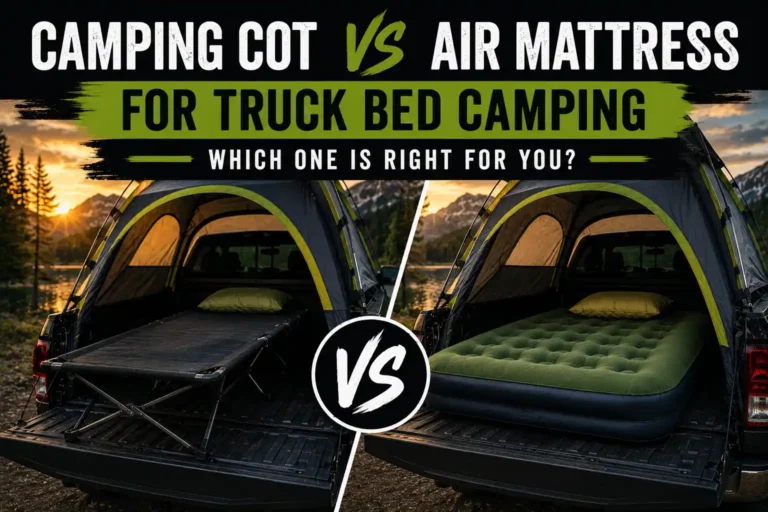
A camping cot on top of a closed-cell foam base layer addresses steps 1 through 3 of the priority sequence simultaneously. The cot elevates you above the metal bed, the foam base insulates the space beneath the cot, and the air column beneath it provides a substantial thermal buffer against conductive heat loss.
The decision between a cot and a pad-based floor system comes down to sleeping style, headroom requirements inside the tent, and budget, all factors worth evaluating against your specific setup before committing to either approach.