How to Secure a Truck Bed Tent in High Winds (Safety & Stability Guide)
Everything about your camping trip is going perfectly. The tent is up, dinner is done, and you are settled into your sleeping bag with the sound of wind moving through the trees above you. Then that wind picks up. Then it picks up again. Then the tent wall beside your face flexes inward with a sharp crack, the whole structure shudders, and a very specific thought enters your mind:
Is this tent actually going to hold?
Wind is the condition that simultaneously exposes every weakness in a truck bed tent setup: loose straps, inadequate guy lines, poorly seated pole joints, gaps in the tailgate sleeve, and a rainfly that was never properly tensioned. In moderate wind, these weaknesses create noise and discomfort. In high wind, they create genuine safety risks.
The good news is that a properly secured truck bed tent is significantly more wind-resistant than most campers realize. The bad news is that most truck tents are not set up to their full wind-resistance potential, because the steps that make the difference between a tent that holds and one that fails are either skipped in fair weather or simply not covered in the product manual.
This guide covers every technique, every anchor point, and every field decision that determines how your truck bed tent performs when the wind genuinely tests it, from campsite selection before setup to emergency stabilization after conditions deteriorate unexpectedly.
Before diving into the specific securing techniques, it is worth understanding that wind resistance begins with the tent you purchase. Our complete tested and ranked guide to the best truck bed tents in 2026 evaluates wind resistance as a core performance criterion, covering pole diameter, attachment system quality, and rainfly coverage across every top-rated model currently on the market.
Understanding Wind and What It Does to a Truck Bed Tent
To secure your tent effectively against wind, you first need to understand the specific ways that wind interacts with the structure, because different wind effects require different solutions.
Uplift Force
Wind moving over the curved surface of a truck tent creates an aerodynamic uplift force, the same fundamental physics that generates lift on an aircraft wing. As wind accelerates over the rounded tent roofline, it creates a low-pressure zone above the tent surface that pulls the fabric upward.
This uplift force acts on the entire tent simultaneously and is resisted primarily by your bed rail attachment straps. If those straps are inadequately tensioned or improperly routed, uplift force will progressively work them loose, first creating movement, then creating gaps, then potentially lifting the tent off the truck bed entirely in extreme conditions.
Lateral Pressure
Wind pushing directly against the tent wall creates lateral pressure that tries to push the entire tent sideways across the truck bed. This force is resisted by the combination of bed rail straps, guy lines, and the pole system’s lateral stiffness.
A tent experiencing high lateral pressure will visibly deform, the windward wall pushing inward and the leeward wall bowing outward. If the pole system cannot absorb this deformation elastically and return to its original shape, pole joints begin to slip, and structural integrity degrades progressively.
Flutter and Fabric Fatigue
Rapid, repeated wind-driven fabric flutter, the snapping and cracking sound that keeps campers awake in windy conditions, creates a specific type of fabric stress called fatigue loading. Individual flutter events are not structurally significant. But thousands of rapid flutter cycles through a windy night progressively weaken fabric at stress concentration points, particularly at pole contact areas, seam intersections, and attachment points.
Properly tensioned guy lines eliminate flutter almost entirely by keeping the rainfly and tent body under constant, even tension that prevents the rapid movement wind requires to create flutter.
Channeling Effect
Terrain features, valleys, mountain passes, gaps between tree lines, open ridgelines, can dramatically amplify wind speed through a channeling effect that accelerates airflow in constrained corridors. A campsite that feels calm on approach can experience wind speeds two to three times higher than the surrounding area due to local terrain channeling.
Understanding this effect is why campsite selection, covered in detail later in this guide, is the single most impactful wind security decision you make before setup even begins.
The Wind Resistance Foundation — Your Tent’s Built-In Capabilities
Before covering what you can do to enhance wind security, it is important to understand what your tent’s design contributes, because the techniques in this guide amplify the capabilities your tent already has. They cannot compensate for fundamental design deficiencies.
Pole Diameter and Material
The diameter and material of your tent poles directly determine how much lateral pressure the tent structure can absorb before deforming permanently.
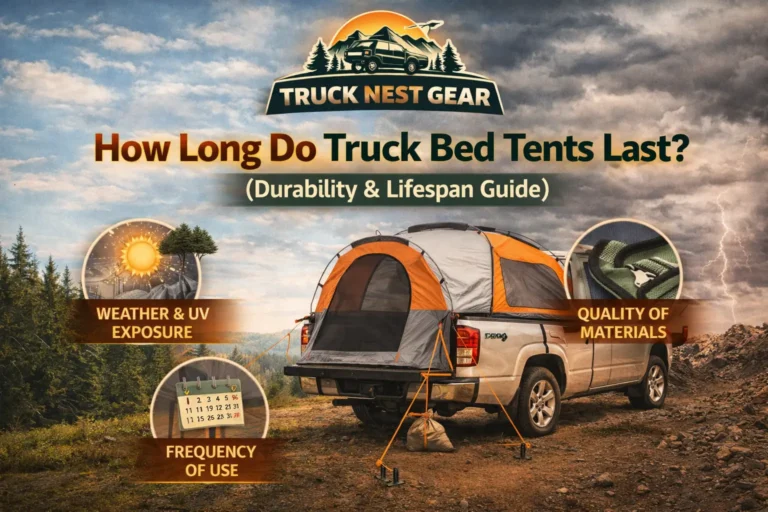
Aluminum poles with a diameter of 8.5mm or above provide the stiffness and elastic recovery needed to handle high wind loads without permanent deformation. Thinner poles flex excessively under lateral pressure, and fiberglass poles, as we established in our truck bed tent durability and lifespan guide, can shatter under sudden high wind loads in cold temperatures rather than bending elastically.
If your current tent has fiberglass poles under 8mm diameter, wind resistance is structurally limited regardless of how well you apply the techniques in this guide. This is a legitimate reason to prioritize aluminum poles in your next tent purchase.
Tent Profile and Geometry
Low-profile tent designs, those with a flatter, more aerodynamic roofline, present less surface area to wind and generate less uplift force than tall, high-volume designs. A truck tent with a peak height of 48 inches presents a significantly larger wind profile than one with a 38-inch peak.
This does not mean you should always choose the lowest-profile tent available; interior comfort matters. But understanding that a taller tent requires more rigorous wind securing techniques helps you apply the right level of preparation for your specific shelter.
Attachment System Quality
The bed rail attachment system is your tent’s primary anchor to the truck — and its quality determines how much force it can transmit from the tent structure to the vehicle before slipping or failing.
Wide webbing straps, 1.5 inches or above, with quality buckle hardware distribute attachment force across a larger contact area on the bed rail than narrow straps, reducing the pressure per unit area and the likelihood of slipping under load. Ratchet-style tensioning systems maintain strap tension more reliably through temperature cycles and repeated stress than simple friction buckles.
Step-by-Step Wind Securing Techniques
These techniques apply sequentially; each one builds on the previous to create a layered wind resistance system that addresses every force type we identified above.
Technique 1 — Strategic Campsite Selection
Wind security begins before your tent leaves the carry bag. The campsite you choose determines the wind environment your tent will face all night, and no amount of guy line work compensates for a genuinely exposed position in high wind.
Choose natural windbreaks: A campsite positioned with a dense stand of conifers on the windward side reduces wind speed at tent level dramatically. Trees do not need to be immediately adjacent; a tree line 20 to 30 feet upwind creates a meaningful wind shadow at ground level.
Use terrain elevation strategically: Positioning your truck slightly below a ridgeline, on the leeward side, places you in the natural wind shadow of the terrain feature. Avoid camping directly on ridgelines, exposed hilltops, or open valley floors where wind accelerates without obstruction.
Identify the prevailing wind direction before parking: Observe the movement of vegetation, the direction of cloud movement, and the feel of the wind on your face before committing to a parking position. Orient your truck with the cab facing the prevailing wind, placing the solid, windproof cab wall as your primary windbreak and keeping the more aerodynamically vulnerable tailgate side in the relative calm of the cab’s wind shadow.
This single orientation decision reduces the effective wind load on your tent by a meaningful margin, because the cab wall deflects and breaks up the airflow before it reaches the tent structure.
Technique 2 — Bed Rail Strap Optimization
The bed rail straps are your tent’s primary anchor, and most campers under-utilize them by attaching only the minimum required connection points and leaving optional attachment points unused.
Use every available attachment point: Most truck bed tents provide more strap attachment points than their instructions indicate as mandatory. In normal conditions, using the minimum set is adequate. In high wind conditions, use every attachment point the tent provides, front, middle, and rear on both sides.
Route straps under the bed rail, not over: Straps routed over the top of the bed rail rely entirely on friction to stay in position. Straps routed under the rail lip and up create a mechanical hook that requires the strap to physically deform the metal rail before it can slip, a dramatically more secure connection.
Check and retighten after the first hour: Strap webbing stretches slightly under initial load as the fibers settle under tension. Check all straps approximately one hour after setup and retighten any that have lost tension. In sustained high wind, check straps again before sleeping.
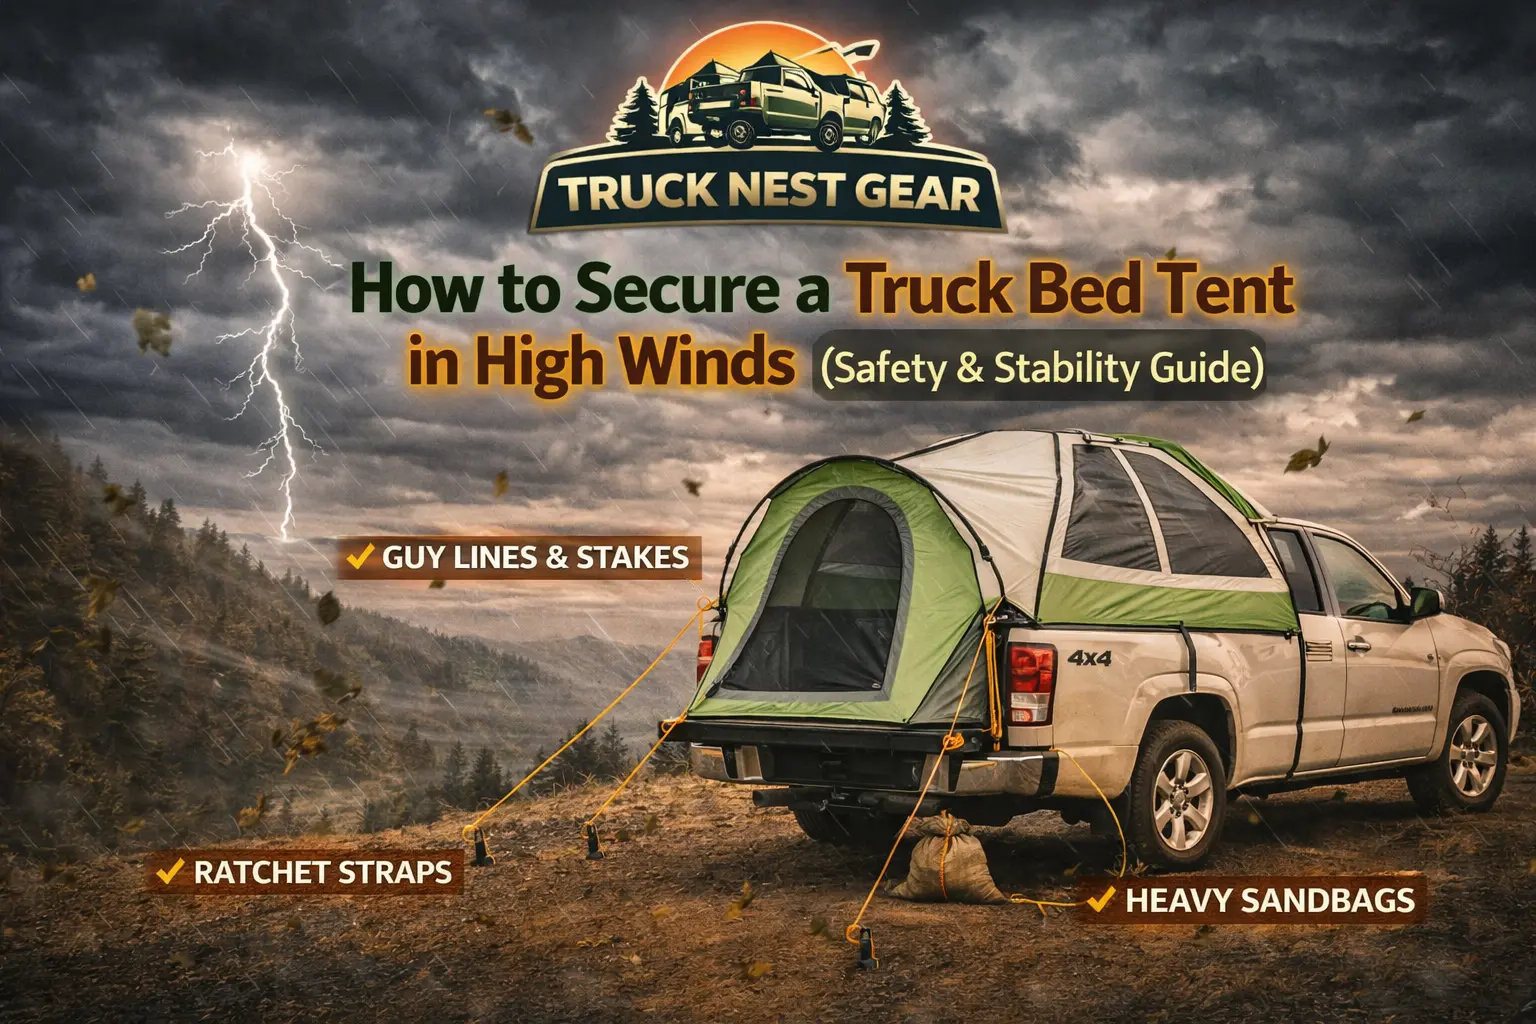
Add supplemental anchor points for extreme conditions: In genuinely high wind conditions, sustained winds above 25 to 30 mph, supplement your bed rail straps with ratchet tie-down straps routed from the tent’s reinforced corner loops, through the truck bed, and anchored to the opposite bed rail. This creates a cross-tensioning system that resists uplift force from any direction simultaneously.
Technique 3 — Guy Line Setup and Staking
Guy lines are the most underutilized wind resistance tool in the average truck camper’s setup, frequently left in the carry bag on the reasoning that the tent seems stable enough without them. In high wind, that reasoning becomes a liability.
What guy lines actually do: Guy lines extend from the lower edges and mid-points of the rainfly and stake into the ground beside the truck. By pulling the rainfly outward and downward at multiple points simultaneously, they accomplish three distinct things:
First, they tension the rainfly against flutter, eliminating the fabric fatigue that sustained snapping creates over a long, windy night.
Second, they pull the rainfly edges outward, increasing the coverage area and closing the gap between the rainfly edge and the tent wall that wind-driven rain and cold air exploit, a vulnerability we identified in both our waterproofing guide and our winter camping guide.
Third, they transfer wind load from the tent structure directly into the ground through the stake system, bypassing the bed rail straps and distributing the total wind load across more anchor points simultaneously.
Correct guy line staking technique: Stakes should be driven at a 45-degree angle away from the tent, angled outward so that the stake resists the pull of the guy line through bearing against the soil rather than relying purely on friction. A stake driven straight down resists uplift well but lateral pull poorly. A stake angled at 45 degrees outward resists both.
In soft soil, use V-shaped or Y-shaped stakes with greater surface area than standard wire stakes. In rocky terrain where staking is impossible, wrap guy lines around large rocks, tree roots, or your vehicle’s tow hooks and recovery points.
Tensioning guy lines correctly: Guy lines should be taut enough to eliminate fabric flutter when you flick the line with a finger, like tuning a guitar string to the correct pitch. Overtightening pulls the rainfly asymmetrically and can distort the tent structure. Undertightening leaves enough slack for flutter to develop in wind gusts.
Adjust guy line tension after dark if wind conditions change; a line that was correctly tensioned at sunset may need adjustment as overnight winds pick up.
Technique 4 — Rainfly Tensioning and Coverage Optimization
The rainfly is both your primary weather barrier and one of the largest surface areas exposed to wind force. How it is tensioned and positioned determines how much wind load it transfers to the tent structure beneath it.
Confirm full rainfly coverage before high wind arrives: The rainfly should extend past the tent walls by a minimum of 6 to 8 inches on all sides. In high wind, check that the rainfly has not shifted from its original position; even a small shift can expose a section of tent wall that becomes a wind pressure concentration point.
Tension attachment clips evenly around the tent: Work around the tent in a systematic sequence when attaching rainfly clips, front left, front right, rear left, rear right, then fill in the middle attachment points. This keeps the rainfly centered under even tension. Attaching one side fully before the other pulls the fly off-center and creates uneven tension that high wind will exploit.
Use the rainfly’s full guy line provision: Most quality rainflies provide guy line loops at multiple points, not just at the four corners. In high wind, use every guy line loop the rainfly provides. The difference in rainfly stability between four corner guy lines and a full eight-point guy line deployment is immediately apparent in sustained wind.
Technique 5 — Tailgate Sleeve Reinforcement
The tailgate sleeve is the most aerodynamically complex part of a truck bed tent. It transitions from the tent structure to a flexible fabric sleeve draped over a flat metal surface, creating an area of inherent wind vulnerability that requires specific attention in high wind conditions.
Secure the tailgate sleeve bottom closures firmly: The bottom closures, straps, hook-and-loop patches, or bungee loops that hold the tailgate sleeve against the underside of the tailgate are critical in wind. Check that every closure is engaged and that the sleeve fits snugly against the tailgate surface with minimal gap on either side.
Add supplemental tailgate closure in extreme conditions: In sustained high winds above 30 mph, supplement the factory tailgate sleeve closures with a ratchet tie-down strap wrapped around the outside of the sleeve and the tailgate, compressing the sleeve against the tailgate surface along its full width. This eliminates the wind-driven billowing of the sleeve that creates both noise and cold air infiltration.
Keep the tailgate fully lowered: A partially lowered tailgate creates an irregular surface that the tailgate sleeve cannot conform to properly, leaving gaps on both sides that wind exploits immediately. Always lower the tailgate fully before attaching the sleeve and confirm it is locked in the open position before sleeping.
Technique 6 — Interior Ballasting
This technique is simple, requires no additional gear, and is surprisingly effective at reducing tent movement in high wind, yet it is rarely mentioned in any truck tent guide.
Use your gear as ballast: Place your heaviest gear items, coolers, water containers, and gear bags inside the tent along the floor perimeter, particularly on the windward side wall. This additional weight lowers the tent’s center of gravity and increases the inertial resistance to uplift force.
A cooler weighing 40 pounds placed against the windward tent wall does not prevent the tent from moving in extreme wind, but it meaningfully reduces the amplitude of movement that sustained gusts create, which reduces stress on every attachment point simultaneously.
Position gear bags along the perimeter, not the center: Gear placed along the floor perimeter provides maximum lateral stability because it acts at the greatest possible distance from the tent’s center. The same weight placed in the center of the tent provides significantly less stabilizing moment.
Technique 7 — Pole Joint Inspection and Security
Pole joints that are not fully seated are the most common single-point failure in wind-stressed tent structures. A pole section that appears connected but is not fully locked creates a hinge point that folds under lateral wind pressure, collapsing the tent structure from the inside.
Inspect every pole joint before closing the tent for the night: Run your hand along each assembled pole and feel for any joint that has any rotational or lateral play. A fully seated pole joint should feel solid and continuous, with no movement in any direction.
Tape critical joints in sustained high wind: In conditions where sustained high winds are expected through the night, wrap a single layer of electrical tape around each pole joint after seating. The tape does not add structural strength, it prevents the slight rotational movement that high wind cycles can use to progressively work a joint loose over several hours.
This technique is borrowed directly from expedition mountaineering tent practice and works for the same reason in a truck tent context.
Reading Wind Conditions — When to Add More Security
Not every camping night requires the full wind securing protocol. Understanding how to read wind conditions and match your securing effort to the actual risk level saves time in calm conditions and ensures you never underestimate a genuinely dangerous situation.
Wind Speed Reference Guide
| Wind Speed | Conditions | Recommended Action |
| Under 10 mph | Light breeze, leaves rustle | Standard setup, guy lines optional |
| 10 – 20 mph | Branches move, flags extend | Guy lines staked, straps checked |
| 20 – 30 mph | Small trees sway, walking effort | Full guy line deployment, ballasting |
| 30 – 40 mph | Large branches move, difficult walking | Full protocol + supplemental anchors |
| Above 40 mph | Whole trees move, structural risk | Consider breaking down tent, sleep in cab |
How to Estimate Wind Speed Without an Instrument
You do not need an anemometer to estimate wind speed accurately enough for camping decisions. The Beaufort Scale, developed for maritime use and applicable to land conditions, gives reliable estimates from observable environmental cues:
- Leaves and small twigs in constant motion → approximately 8 to 12 mph
- Small branches moving, dust and loose paper raised → approximately 13 to 18 mph
- Small trees beginning to sway → approximately 19 to 24 mph
- Large branches in motion, difficulty using umbrella → approximately 25 to 31 mph
- Whole trees in motion, resistance walking into wind → approximately 32 to 38 mph
Emergency Stabilization — What to Do When Wind Picks Up Unexpectedly
Despite the best preparation and campsite selection, wind sometimes arrives faster and stronger than any forecast predicted. Here is the correct sequence of actions when wind conditions deteriorate after you are already set up and inside the tent:
Step 1 — Do not wait to see if it passes: The instinct is to stay warm in the sleeping bag and hope the gust is temporary. Resist this instinct. The time to add security is before conditions reach their peak, not after the tent is already moving significantly.
Step 2 — Add guy lines immediately: If guy lines are not yet staked, exit the tent and stake them before doing anything else. This is the single action with the greatest immediate impact on tent stability.
Step 3 — Retighten all bed rail straps: Wind load causes strap webbing to stretch under sustained tension. Straps that were correctly tensioned at setup may have lost meaningful tension after several hours of wind loading. A quick circuit of the truck, retightening every strap, takes less than three minutes and meaningfully improves stability.
Step 4 — Check the tailgate sleeve: Confirm the sleeve is still sealed against the tailgate with no gaps that have opened from wind movement. Add the supplemental ratchet strap closure if you have one available.
Step 5 — Reassess the threshold: If wind speeds are approaching or exceeding 40 mph with no forecast improvement, the correct decision is to break down the tent and sleep in the truck cab. No truck bed tent is engineered as a safe shelter in sustained 40+ mph wind, and the consequences of a structural failure in those conditions range from significant gear damage to genuine personal injury.
The Accessories That Genuinely Help in High Wind
Certain accessories provide meaningful wind resistance enhancement beyond standard setup techniques. These are worth carrying on every trip where wind is a realistic possibility, which in mountain, coastal, and open terrain environments means essentially every trip.
Ratchet Tie-Down Straps: Four ratchet tie-down straps of 1-inch width and 8-foot length provide the supplemental anchoring capacity for cross-tensioning and tailgate sleeve reinforcement described in the techniques above. They weigh almost nothing, cost very little, and have uses well beyond tent securing.
Sand or Snow Stakes: Standard wire tent stakes pull out of soft soil in high wind before the guy line tension reaches its rated capacity. Wide-blade sand stakes or Y-profile snow stakes provide dramatically greater holding power in soft, sandy, or snowy ground, the terrain types where truck campers most frequently camp in wind-exposed locations.
Windproof Guy Line Tensioners: Plastic or aluminum line tensioners, sometimes called line tighteners or guy line runners, allow precise adjustment of guy line tension without re-staking. In changing wind conditions where guy line tension needs periodic adjustment through the night, these small devices save significant time and effort compared to manually re-knotting every line.
A Portable Weather Radio or Wind App: Knowing what wind conditions are forecast for the coming hours before you sleep, rather than discovering them at 2 am, allows proactive rather than reactive securing decisions. A portable NOAA weather radio or a reliable wind forecast app gives you the information to make those decisions with confidence.
If you are building out your full truck camping accessory kit and want to see how wind security gear fits into the broader picture of truck camping comfort and preparedness, our complete article on truck bed tent accessories that make camping more comfortable in 2026 covers the full range of additions that experienced truck campers consider essential, from sleep system upgrades to lighting, organization, and weather preparedness tools.
Final Thoughts
Wind is not the enemy of truck bed tent camping; unpreparedness is. A truck bed tent that is properly sited, correctly anchored, fully guy-lined, and set up by someone who understands how wind forces interact with the structure is a genuinely capable shelter in conditions that would send an improperly secured tent tumbling across the campsite.
The techniques in this guide are not complex. They require no specialized skills and very little additional gear. What they do require is deliberate attention during setup, the willingness to spend an extra fifteen minutes confirming every attachment point, staking every guy line, and reading the wind environment before closing the tent for the night.
That fifteen minutes of preparation is what separates a genuinely secure camping experience from a night spent listening to your tent walls flex and wondering if the straps are going to hold.
When you are ready to identify the specific truck bed tent models that combine the strongest pole systems, the most secure attachment hardware, and the most wind-resistant rainfly designs currently available, our complete tested and ranked guide to the best truck bed tents in 2026 evaluates every leading model against exactly these structural and wind-resistance standards, giving you a shortlist built on real performance criteria rather than marketing claims.